Breakfast & Brunch
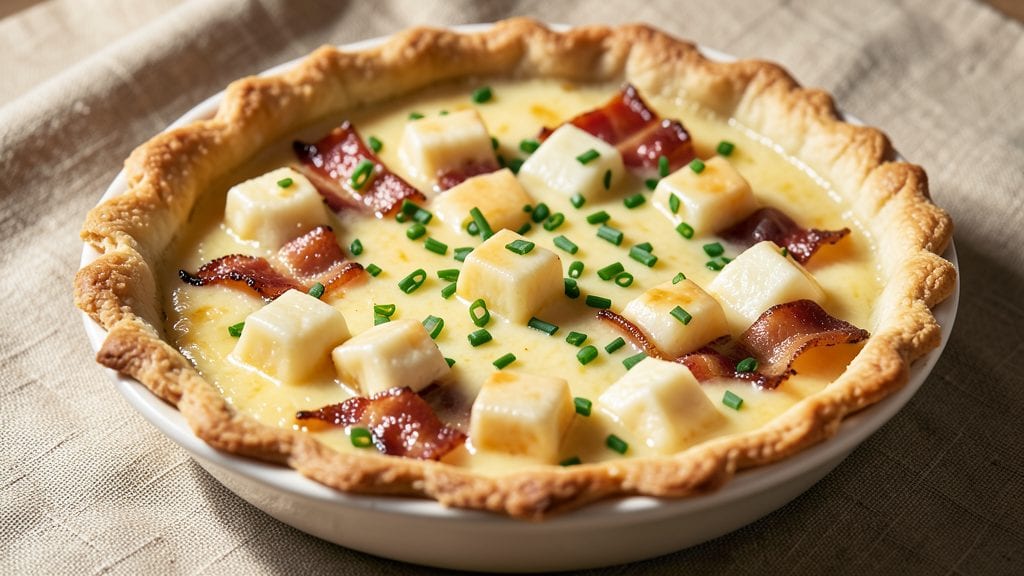
This cheddar cheese quiche recipe delivers the perfect balance of crisp golden crust and an impossibly gooey, savory center that holds its shape without being dry. The secret lies in precise egg-to-cheese ratios and a baking technique that ensures the filling sets just right—no more rubbery centers or soggy crusts.
I developed this version after testing dozens of quiches, and it consistently earns rave reviews for its restaurant-quality texture and rich cheddar flavor.
The recipe begins with a classic pie crust (homemade or store-bought) that forms the sturdy foundation, while the filling combines eggs, heavy cream, and sharp cheddar cheese for that signature melt-in-your-mouth quality.
Optional add-ins like crispy bacon, sautéed mushrooms, or diced ham let you customize the quiche to suit any breakfast or brunch menu. The key to success is baking at the right temperature for the right amount of time—no guesswork involved.
What you'll end up with is a quiche that's golden brown on top, with a flaky crust that shatters slightly at the edges and a filling that's creamy yet firm enough to slice neatly.
The sharp cheddar cheese melts into strands throughout, creating pockets of gooey goodness in every bite. This is the kind of quiche that makes brunch feel special without requiring hours in the kitchen.
Serve it warm with a side of fresh greens or crusty bread, or let it cool slightly for easy slicing. The leftovers reheat beautifully, making it perfect for meal prep or entertaining. Let's get started on creating your perfect cheddar cheese quiche.
Ingredients for cheddar cheese quiche
Golden crust meets gooey cheddar perfection—just 12 ingredients for restaurant-quality quiche magic.
| Ingredient | Amount | Notes |
|---|---|---|
| Pie Crust (Store-Bought or Homemade) 🥧 | 1 whole | Pre-baked for sturdy foundation |
| Large Eggs 🥚 | 4 whole | Room temperature for even baking |
| Heavy Cream 🥛 | 1 cup | Full-fat for creamy texture |
| Sharp Cheddar Cheese 🧀 | 2 cups | Shredded, block preferred |
| Milk 🥛 | ½ cup | Whole milk for richness |
| Salt 🧂 | ½ tsp | Kosher or sea salt |
| Black Pepper 🌶️ | ¼ tsp | Freshly ground for flavor |
| Fresh Chives 🌿 | 2 tbsp | Chopped, for garnish |
| Butter 🧈 | ¼ cup | Melted, for crust brushing |
| Optional Bacon 🥓 | 4 oz | Cooked crisp, crumbled |
| Optional Mushrooms 🍄 | ½ cup | Sautéed, sliced |
| Optional Ham 🍖 | ½ cup | Diced, cooked |
The cheddar is non-negotiable here. Sharp, aged cheddar from a block (like Cabot or Tillamook) shreds better and melts into those perfect strands. Pre-shredded gets clumpy—grab a box and grate it yourself. For the crust, Pillsbury or homemade both work, but if you're using store-bought, let it chill in the fridge for 30 minutes before rolling. That extra rest makes all the difference in flakiness. The eggs? Room temperature is key—they'll bake more evenly and give you that silky texture. I always crack mine into a bowl first to check for any shell surprises.
No sharp cheddar? Extra-sharp or pepper jack works in a pinch, but the flavor won't be quite the same. Short on heavy cream? Half-and-half plus a splash of milk keeps things creamy. The optional add-ins are where you can get creative—crispy bacon from Costco is my go-to, but sautéed mushrooms or diced ham both add depth. Pro tip: if you're adding veggies, sauté them first to remove moisture, or your quiche filling will get watery. And if you're making this ahead? Bake it the night before—it reheats beautifully and tastes even better the second time around.
This quiche is a meal prep dream. Store leftovers covered at room temp for up to 2 hours, then refrigerate for 4-5 days. Reheat slices in a 350°F oven for 10-12 minutes—the crust gets crispy again, and the filling warms through perfectly. For parties, assemble the quiche in the crust, refrigerate overnight, then bake straight from the fridge. No need to thaw—just add 10 minutes to the baking time. The crust stays flaky, and the filling comes out just right. Freeze portions for up to 3 months—just thaw in the fridge overnight before reheating.
Why You'll Love This Recipe
- No-Fuss Assembly: I swear by this recipe because it’s the kind of dish where the hardest part is deciding whether to use store-bought crust or roll my own. Crack eggs, stir cream, shred cheese—done. No fancy techniques, no waiting for hours. Even on days when I’d rather watch Netflix than cook, this comes together faster than my willpower to resist seconds.
- Cheese Pulls Hard: That sharp cheddar? It’s the star. The moment the custard sets and you cut into it—golden edges, creamy center, and cheese so tangy it makes you want to close your eyes—you’ll forget about "healthy" eating. Honestly, the first time I made this, my husband stole half before it even cooled. (Yes, even on a Tuesday night.)
- Leftovers That Work: This quiche is my secret weapon for busy mornings. Bake one on Sunday, and you’ve got breakfast for the week—no sad, soggy eggs in the fridge. It reheats beautifully (microwave or oven, no judgment) and still tastes like you slaved over it. My kids pretend not to love it, but they’re the first to grab slices for lunchboxes.
- Budget Breakfast Boost: Eggs, milk, and cheese? That’s it for the fancy stuff. The crust is optional if you’re pinching pennies, and the flavor still shines. I’ve made this for potlucks, lazy Sundays, and even as a side for dinner when I ran out of ideas. It’s the kind of recipe that proves you don’t need a gourmet budget to feel like you’re eating at a bistro.
Step-by-step instructions for cheddar cheese quiche
Here's how to create a showstopping quiche with that perfect golden crust and creamy, cheesy center.
Prep and Blind-Bake the Crust
Preheat your oven to 375°F. Roll out the pie crust on a floured surface to fit a 9-inch pie dish, leaving a slight overhang. Gently press it into the dish and trim the edges, leaving about ½-inch extra. Prick the bottom all over with a fork to prevent puffing.
Line the crust with parchment paper, fill it with pie weights or dried beans, and bake for 15 minutes. Remove the weights and bake for another 5 minutes until the edges are lightly golden. This pre-baking creates a sturdy foundation that won't sog down when you add the filling. Let it cool for 10 minutes before filling.
Cook Your Fillings (If Using)
If you're adding the optional bacon, cook it in a skillet over medium heat until crispy, then drain on paper towels and crumble. For mushrooms, sauté them in 1 tablespoon butter until golden and any moisture has evaporated. If using ham, simply dice it into ¼-inch pieces and set aside.
I like to combine all my fillings in a bowl first—this ensures even distribution in the quiche. For a classic version, skip the fillings and just use the sharp cheddar cheese. Whatever you choose, make sure everything is at room temperature before assembling.
Whisk the Egg Mixture
In a large bowl, whisk together the 4 whole large eggs, 1 cup heavy cream, ½ cup milk, ½ teaspoon salt, and ¼ teaspoon black pepper until completely smooth. The mixture should be well combined with no streaks of egg white.
Gradually add the 2 cups shredded sharp cheddar cheese and any cooked fillings (bacon, mushrooms, ham) to the egg mixture. Stir gently just until everything is incorporated—don't overmix. If using fillings, distribute them evenly throughout the mixture so every slice gets a taste.
Assemble and Bake to Perfection
Pour the egg mixture into the pre-baked crust, spreading it evenly with a spatula. The filling should come about ½-inch below the crust's edge. Sprinkle the 2 tablespoons chopped fresh chives evenly over the top for a pop of color and freshness.
Bake at 350°F for 40-45 minutes until the center is just set but still slightly jiggly in the middle (it will continue cooking as it cools). The edges should be golden brown and the top should be puffed slightly. If the crust starts browning too quickly, tent it loosely with aluminum foil.
Rest and Serve with Confidence
Remove the quiche from the oven and let it rest for 10-15 minutes before slicing. This resting time allows the filling to fully set and the juices to redistribute, preventing a runny center. The quiche should be golden on top with a slightly puffed center that's still creamy.
Slice into 6 equal wedges and serve warm or at room temperature. The sharp cheddar should be melted but still noticeable in each bite, with that perfect balance of creamy custard and crispy crust. Store any leftovers in the refrigerator for up to 3 days, reheating slices in the oven at 350°F for 10-15 minutes to restore that golden finish.
Pro Tips For Making Cheddar Cheese Quiche
- Preheat Crust Blind: Blind-baking that pie crust for 8–10 minutes at 375°F (with pie weights or dried beans) prevents a soggy bottom—no one wants a quiche that tastes like a cheese-soaked paper towel. I learned this the hard way after my first batch turned into a sad, greasy puddle.
- Shred Cheese Fresh: Pre-shredded cheddar has anti-caking agents that make it clump into a dense, rubbery mess when baked. Grate your own sharp cheddar right before mixing—it melts smoother and distributes evenly, giving you that perfect creamy, pull-apart texture.
- Don’t Overmix the Filling: Stir the egg-cream-cheese mixture just until the cheese is mostly incorporated—lumps are fine, but don’t turn it into a paste. Overworking it introduces too much air, which can cause the quiche to puff unevenly or crack. Think "swirled, not smooth."
- Bake Until the Center Jiggles: A quiche’s done when the edges are golden and the center still wobbles slightly—it’ll set as it cools. Poking it with a knife? Bad idea—you’ll end up with a runny center or a collapsed top. Trust the jiggle test, not the knife.
Essential equipment for this recipe
Pie Dish Essentials
Start with a 9-inch deep-dish pie plate—I recommend Corelle stoneware for its even heat distribution and non-stick surface. If you prefer metal, Wilton pie pans are my go-to for professional results. Avoid glass dishes unless they're specifically labeled for baking—standard glass can cause uneven browning.
For a rustic touch, try a cast-iron skillet (like Lodge) with a removable bottom for easy slicing. 🥧
Crust Tools
A rolling pin is non-negotiable for smooth crusts—I love the OXO Good Grips for its non-slip handle. For shaping, keep a pie crust cutter (or a glass bowl) handy to press the dough evenly.
A pastry brush (like King Arthur's silicone brush) is perfect for brushing melted butter on the crust before baking. Don’t skip the fork for pricking the crust—it prevents puffing and creates that perfect flaky texture. 🌟
Mixing & Measuring
Use a whisk (I prefer OXO's stainless steel) to combine eggs and cream smoothly—no lumps allowed! A fine-mesh grater (like Microplane) is essential for shredding sharp cheddar evenly.
For precise measurements, a digital kitchen scale (I use OXO's) ensures consistent results. A rubber spatula helps scrape every last bit of filling into the crust. 💡
Baking Gear
A baking sheet lined with parchment is useful for pre-baking crusts—it catches drips and makes cleanup easy. An oven thermometer (like Thermoworks) is a game-changer for accuracy, especially if your oven runs hot.
For fillings, a non-stick skillet (I use All-Clad) prevents bacon or mushrooms from sticking. A pie server (or sharp chef’s knife) makes slicing effortless. 🔥
Optional Upgrades
For extra crispiness, invest in a pie weight set (or use dried beans) to blind-bake crusts perfectly. A laser thermometer (like Thermoworks Smoke) helps monitor internal temps for that just-set filling.
For garnishes, a microplane adds fresh chives with ease. And if you’re feeling fancy, a quiche dish with a removable bottom (like Le Creuset) makes serving a breeze. ✨
Nutrition facts
Frequently asked questions
Can I make this quiche ahead of time?
Assemble the quiche in the crust, cover it, and refrigerate overnight. When ready to bake, add 10-15 extra minutes to the baking time since it'll be cold. The crust stays flaky, and the filling comes out perfectly set. This method is ideal for brunch hosting—just pop it in the oven while guests arrive.
Why does my quiche filling get watery?
Watery filling usually happens from two things: uncooked veggies (like mushrooms) releasing moisture or overmixing the egg mixture. Always sauté veggies until dry, and stir the filling just until combined. For extra insurance, let the quiche rest 15 minutes after baking before slicing—this lets the custard firm up.
What's the best way to reheat leftovers?
Slice the quiche and reheat portions in a 350°F oven for 10-12 minutes on a baking sheet. This restores the golden crust and creamy texture without drying out the filling. For microwave reheating, cover with a damp paper towel and heat for 20-30 seconds—just enough to warm through.
Can I use cream cheese instead of sharp cheddar?
While you can substitute cream cheese, you'll lose the signature sharp, melty texture. For a similar creamy quality, blend 1 cup cream cheese with 1 cup sharp cheddar to balance richness. The quiche will still be delicious but with a milder flavor profile. For maximum cheddar impact, stick with the original recipe.
How do I prevent a soggy crust?
The secret is blind-baking the crust for 20 minutes total before adding filling. Cool it completely before filling, and avoid overfilling—keep the egg mixture ½-inch below the crust edge. For extra insurance, brush the pre-baked crust with melted butter before adding the filling. This creates a moisture barrier that keeps the crust crisp.